How to Add Drag and Drop to Wix Website
Ever wanted to add drag and drop functionality to your Wix website? Learn how in this article.

Ever wanted to add drag and drop functionality to your Wix website? Learn how in this article.
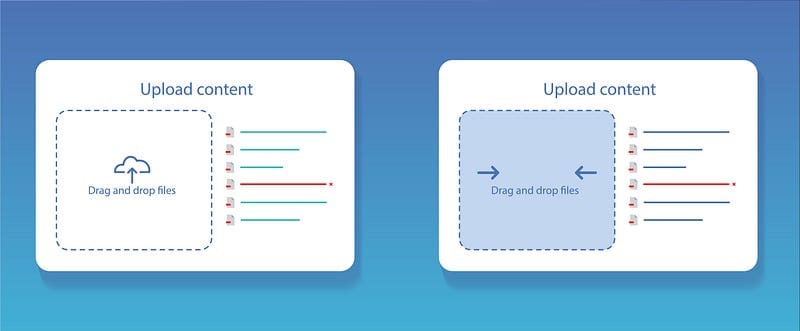
The ability to drag and drop files for uploading can drastically simplify websites. Many modern websites implement this functionality, allowing website visitors to simply ‘Drag’ the files they wish to upload to the screen and then ‘Drop’ them to trigger an upload.
Wix doesn’t support this functionality out of the box. This means that you’re often stuck using ‘Upload’ buttons, a solution that can be a bit ugly. Worse, this can introduce extra clicks for visitor interactions, which has been shown to reduce sales.
In this article, I’ll show you how to implement drag and drop on your Wix website. All you need is a basic understanding of Javascript, the ability to add an HTML Component to your website, and enough knowledge to navigate the Wix Editor.
If you’d like to see a working example of this functionality, check out this link where I’ve implemented it (note, as discussed later in the article you will need to sign up for a free login to see it). However, if you don’t want to sign up, I’ve made sure to include helpful screenshots throughout.
Throughout the article, I’ve used a common color scheme and logo combination, to demonstrate easy ways to brand this content for yourself. All images were developed by me on Canva.
To get started, set up a new project on your Wix account. At a minimum, you’ll need the following:
Now we’ll start adding the base components you’ll need to get started.
UserId, Image, and the optional CartId if you’re attaching this functionality to the Wix Store app.I’ll outline a few complexities to help frame the the article.
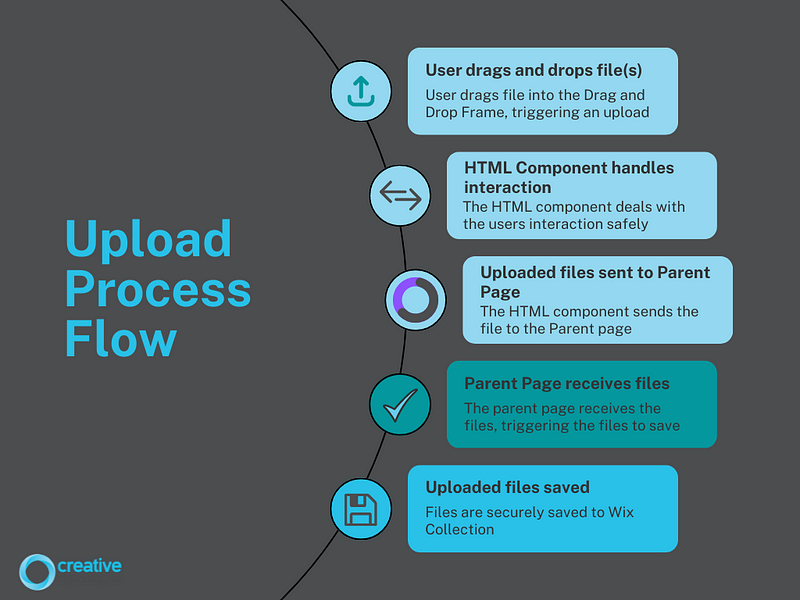
Here’s what the upload process flow we’ll be implementing looks like:
Let’s set up the drag-and-drop HTML component in way that:
To do this, we must declare the HTML page. Insert the code below in your HTML Component.
<html>
  <head>
    <title>File Upload</title>
    <script type="module" src="./index.js"></script>
    <style>
      body {
        border-style: solid;
        border-color: #29c1e8;
        margin: 0px 0px 0px 0px;
      }
    </style>
  </head>
  <body>
  </body>
</html>
If you save this, you’ll see your page now has a nice border around it. I’ve chosen to go with a border color that matches the coloring of my brand, but you can use any color you want.
Add a new div to the <body>of your HTML component which declares the drag-and-drop event handlers (links to the Javascript functions at bottom of article).
<div
   id="dropzone"
   style="height: 100%; width: 100%;"
   >
</div>
Within the <div>, add a <img> declaration and provide a link to an upload image you’d like to use.
<img
id="displayImg"
src="your_url.svg"
style="width:100%; height:100%;"
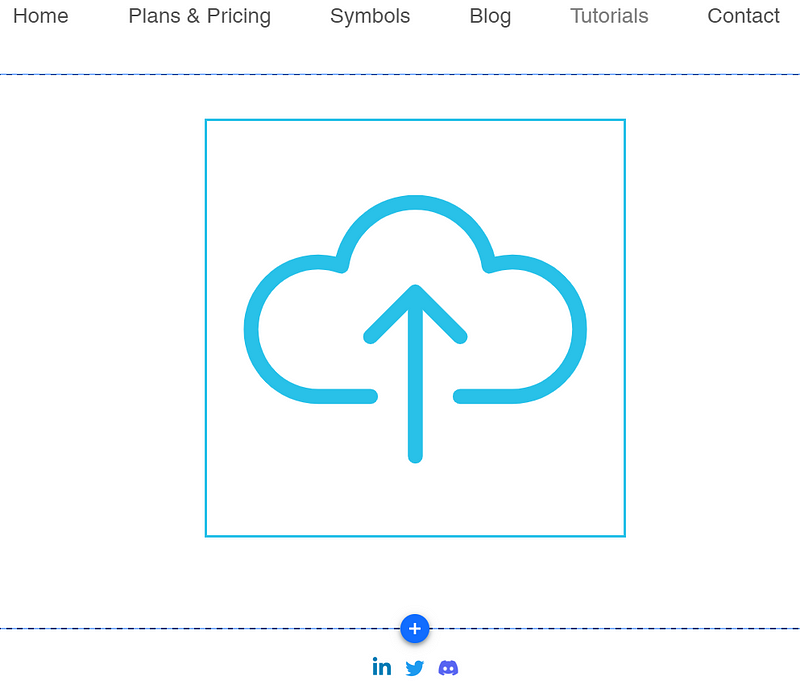
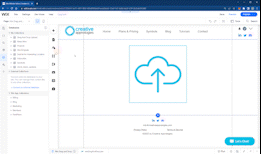
>Note. I always prefer to use the .svg format in this scenario. SVG’s are smaller, and look great on any size screen.Here’s what my upload HTML component looks like in my Wix Editor:
Now, let’s handle our drag events and drop events. We need to:
Here’s how:
<script> tags<script>
const imageList = document.querySelector('.image-list');
const fileInput = document.querySelector('files');
const dropzone = document.querySelector('.dropzone');
const setActive = (dropzone, active = true) => {
const hasActiveClass = dropzone.classList.contains('active');
if(active && !hasActiveClass){
document.getElementById("displayImg").src = "https://static.wixstatic.com/shapes/c76efe_dbbb002c4ac04c96b3a463d0f3e49141.svg";
return dropzone.classList.add('active');
}
if(!active && hasActiveClass){
document.getElementById("displayImg").src = "https://static.wixstatic.com/shapes/c76efe_0c1c63fb6eea49aaafdfe9d2008d56a5.svg";
return dropzone.classList.remove('active');
}
}
dropzone.addEventListener('dragenter', (e) => {
e.preventDefault();
setActive(dropzone);
});
dropzone.addEventListener('dragover', (e) => {
e.preventDefault();
setActive(dropzone);
});
dropzone.addEventListener('dragleave', (e) => {
e.preventDefault();
setActive(dropzone, false);
});
dropzone.addEventListener('drop', (e) => {
e.preventDefault();
setActive(dropzone, false);
document.getElementById("displayImg").src = "https://static.wixstatic.com/media/c76efe_d623f6694f9c434bb2b1b07d286fa697~mv2.gif";
});
</script>As you can see, we’ve now added some event handlers to our page. We track:
Here’s what mine looked like in Preview mode (Windows Game bar doesn’t show you the file I drag and drop):
With our event handlers in place, it’s time to send our uploaded files to the Parent page.
Security Note. Sending information from an HTML Component to a parent page can cause insecurity on your webpage. Make sure you always specify and filter incoming messages.
Return to the HTML Component and update it with the functionality to send messages to the Parent page.
Note. The getParentURL() function below ensures that you only send information to the Parent page. If you don’t include it, you may find some browsers block you as this is a common information security problem.// Get the parent URL
function getParentUrl(){
var parentURL = "No URL"
parentURL = (window.location != window.parent.location)
? document.referrer
: document.location.href
return parentURL;
}
// Send messages to parent
function sendMessageToParent(type, message){
var parentURL = getParentUrl();
let messageObject = {
type: type,
message: message,
}
window.parent.postMessage(messageObject, parentURL)
}With message sending/receiving enabled, dropped files need to be processed. We need to:
Add the below functions to your HTML Component:
// Handle files
const handleFiles = (files) => {
// Get valid files
let validFiles = [...files].filter((file) =>
['image/jpeg', 'image/png'].includes(file.type)
);
// Show the image
validFiles.forEach(uploadFiles);
// Return display at completion of upload
document.getElementById("displayImg").src = "https://static.wixstatic.com/shapes/c76efe_0c1c63fb6eea49aaafdfe9d2008d56a5.svg";
}
// Show Image function
const uploadFiles = (image) => {
const reader = new FileReader();
reader.readAsDataURL(image);
reader.addEventListener('load', (e) => {
sendMessageToParent("File", e.target.result);
});
}As you can see, the line validFiles filters so that only .png and .jpeg files will be uploaded. A list of file types is included in the resources section at the bottom.
Now update the dropzone.addEventListener(‘drop’ function from the previous section so that it triggers handleFiles. Here’s what it should look like:
dropzone.addEventListener('drop', (e) => {
e.preventDefault();
setActive(dropzone, false);
document.getElementById("displayImg").src = "https://static.wixstatic.com/media/c76efe_d623f6694f9c434bb2b1b07d286fa697~mv2.gif";
// Get the FileList
const {files} = e.dataTransfer;
handleFiles(files);
});In order for the images to be processed by your Wix site, you need to enable the site to receive messages from the HTML Component.
Add the following to your Wix Drag and Drop page:
$w.onReady(function () {
$w('#dragAndDrop').onMessage((event) => {
let receivedData = event.data;
// Send the received message to our processMessage function
if(receivedData.type == "File"){
processImage(receivedData);
}else if(receivedData.type == "Debug"){
console.log(receivedData.message);
}
});
});
export async function processImage(imageData) {
console.log("New Image Received");
}Astute readers will probably notice that I’ve incorporated a couple of different message options. This allows me to send custom logging from the HTML Component — something which is particularly helpful when troubleshooting or running your website at scale!
With the files being sent to the parent page, it’s time to store them in the collection created near the start (Drag and Drop Upload).
Start by updating your Wix page in a way that will allow you to definitively link files to users. Two easy ways to do this are to use the Cart Id (which is unique to a user and order but requires the Wix Stores App) or User Id (which is unique to a user). In my example, I haven’t linked my upload page to a store, so I’ll hide the page behind a (free) login.
Next, create a backend function called wixDragAndDrop.jsw in your backend. This function will take files uploaded by users, associate them with the userId, then save them into the Drag and Drop Upload collection. Here’s the code:
import wixData from 'wix-data';
import {currentMember} from 'wix-members-backend';
export async function addFile(fileImage){
let logging = {
"function": "addFile",
"location": "backend/tutorials"
}
let memberOptions = {
fieldsets: ['FULL']
}
// Add user email for tracking
let userId = await currentMember.getMember(memberOptions).then(member => {
return member._id;
}).catch(err => {
console.error(err);
})
logging.userId = userId;
// Create the insert object
let insertObject = {
userId: userId,
image: fileImage
}
// Set permissions
let options = {
"suppressAuth": true
}
console.log(logging);
wixData.insert("DragAndDropUpload", insertObject, options).then(item => {
console.log("Inserted Successfully");
}).catch(err => {
console.log(err);
});
}Return to the parent page, import the backend function, then update the processImage function with the following:
addFile(newImage);Here’s a demonstration of the functionality working:
I love hearing from my readers, so feel free to reach out. It means a ton to me when you clap for my articles or drop a friendly comment — it helps me know that my content is helping.
❤
<html>
<head>
<title>File Upload</title>
<script type="module" src="./index.js"></script>
<link rel="stylesheet" href="https://maxcdn.bootstrapcdn.com/bootstrap/3.4.1/css/bootstrap.min.css">
<script src="https://ajax.googleapis.com/ajax/libs/jquery/3.6.1/jquery.min.js"></script>
<style>
body {
border-style: solid;
border-color: #29c1e8;
margin: 0px 0px 0px 0px;
}
</style>
</head>
<body>
<main>
<div
id="dropzone"
style="height: 100%; width: 100%;"
>
<img
id="displayImg"
src="https://static.wixstatic.com/shapes/c76efe_0c1c63fb6eea49aaafdfe9d2008d56a5.svg"
alt="Wix Drag and Drop Upload"
width="100%"
/>
</div>
</main>
</body>
<script>
const imageList = document.querySelector('.image-list');
const fileInput = document.querySelector('files');
const dropzone = document.querySelector('.dropzone');
const setActive = (dropzone, active = true) => {
const hasActiveClass = dropzone.classList.contains('active');
if(active && !hasActiveClass){
document.getElementById("displayImg").src = "https://static.wixstatic.com/shapes/c76efe_dbbb002c4ac04c96b3a463d0f3e49141.svg";
return dropzone.classList.add('active');
}
if(!active && hasActiveClass){
document.getElementById("displayImg").src = "https://static.wixstatic.com/shapes/c76efe_0c1c63fb6eea49aaafdfe9d2008d56a5.svg";
return dropzone.classList.remove('active');
}
}
dropzone.addEventListener('dragenter', (e) => {
e.preventDefault();
setActive(dropzone);
});
dropzone.addEventListener('dragover', (e) => {
e.preventDefault();
setActive(dropzone);
});
dropzone.addEventListener('dragleave', (e) => {
e.preventDefault();
setActive(dropzone, false);
});
dropzone.addEventListener('drop', (e) => {
e.preventDefault();
setActive(dropzone, false);
document.getElementById("displayImg").src = "https://static.wixstatic.com/media/c76efe_d623f6694f9c434bb2b1b07d286fa697~mv2.gif";
// Get the FileList
const {files} = e.dataTransfer;
handleFiles(files);
});
// Handle files
const handleFiles = (files) => {
// Get valid files
let validFiles = [...files].filter((file) =>
['image/jpeg', 'image/png', 'application/pdf'].includes(file.type)
);
// Show the image
validFiles.forEach(uploadFiles);
// Return display at completion of upload
document.getElementById("displayImg").src = "https://static.wixstatic.com/shapes/c76efe_0c1c63fb6eea49aaafdfe9d2008d56a5.svg";
}
// Show Image function
const uploadFiles = (image) => {
const reader = new FileReader();
reader.readAsDataURL(image);
reader.addEventListener('load', (e) => {
sendMessageToParent("File", e.target.result);
});
}
// Get the parent URL
function getParentUrl(){
  var parentURL = "No URL"
  parentURL = (window.location != window.parent.location)
      ? document.referrer
      : document.location.href
  return parentURL;
}

// Send messages to parent
function sendMessageToParent(type, message){
  var parentURL = getParentUrl();
  let messageObject = {
      type: type,
      message: message,
  }
  window.parent.postMessage(messageObject, parentURL)
}
</script>
</html>import {addFile} from 'backend/tutorials/wixDragAndDrop'
$w.onReady(function () {
$w('#dragAndDrop').onMessage((event) => {
let receivedData = event.data;
// Send the received message to our processMessage function
if(receivedData.type == "File"){
processImage(receivedData);
}else if(receivedData.type == "Debug"){
console.log(receivedData.message);
}
});
});
export async function processImage(imageData) {
console.log("New Image Received");
// Receive the new image
let newImage = imageData.message
addFile(newImage);
}import wixData from 'wix-data';
import {currentMember} from 'wix-members-backend';
export async function addFile(fileImage){
let logging = {
"function": "addFile",
"location": "backend/tutorials"
}
let memberOptions = {
fieldsets: ['FULL']
}
// Add user email for tracking
let userId = await currentMember.getMember(memberOptions).then(member => {
return member._id;
}).catch(err => {
console.error(err);
})
logging.userId = userId;
// Create the insert object
let insertObject = {
userId: userId,
image: fileImage
}
// Set permissions
let options = {
"suppressAuth": true
}
console.log(logging);
wixData.insert("DragAndDropUpload", insertObject, options).then(item => {
console.log(item);
}).catch(err => {
console.log(err);
});
}