Wix Events Step-by-Step Setup Guide: Full Event Configuration
Learn how to fully configure your Wix Event to best serve your customers

Learn how to fully configure your Wix Event to best serve your customers
Welcome back to our series on creating a fully featured event on your Wix Website using the Wix Events App.
I’m super excited to cover how we can go about configuring our event to maximise the value it brings to our customers, which will in turn increase our sales.
So let’s get our ‘Customer Service’ hats on and get into it!
This in-depth tutorial series teaches you everything you need to know to setup and publish events using the Wix Events app. You’ll learn how to:
Each episode has a full list of the episodes at the bottom and solves a particular part of the puzzle.
If you need extra help, don’t hesitate to reach out to my company Creative Appnologies. We would love to help you ❤️
In this episode, we’ll be diving into how to configure your Wix Event. We’ll be covering the following:
By the end of the episode, you’ll have a fully configured event ready to go for your website.
Super cool!
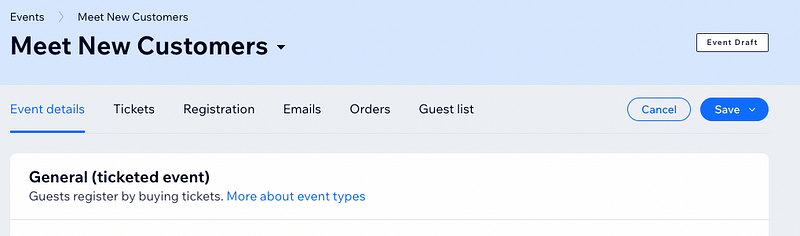
The Event details section of our new event is where we update more details about our event.
It’s a section which deals with a lot of customer facing items — things they’ll directly see. Therefore, it’s definitely worth taking some time to get the details right!
There’s a couple of gotcha’s in this section, so let’s get into it.
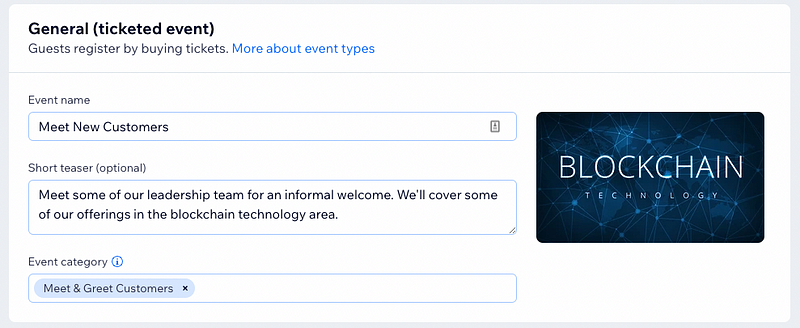
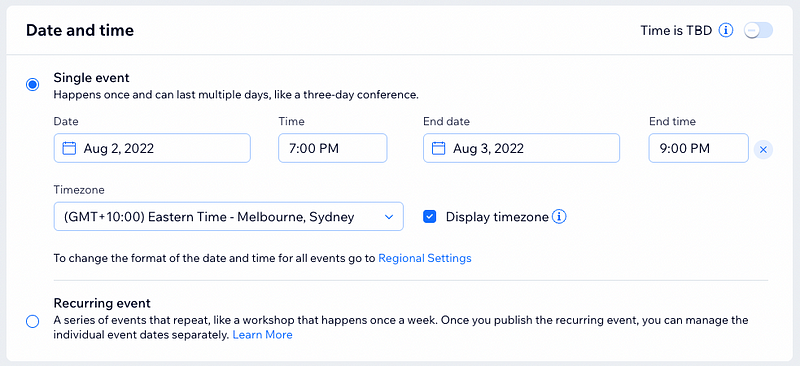
The general section deals with an overview of the event. There’s not too much to worry about here, so I’ll just list them out.
Here’s what my section looked like:
Once again, this should be a pretty straightforward setup. The only gotcha here is the ‘Time is TBD’ option. If you toggle this on (i.e. you don’t display a set date / time), be aware that you will not be able to use the Video Conferencing option later on.
The rest of the options are pretty much as you’d expect
Here’s what mine looked like:
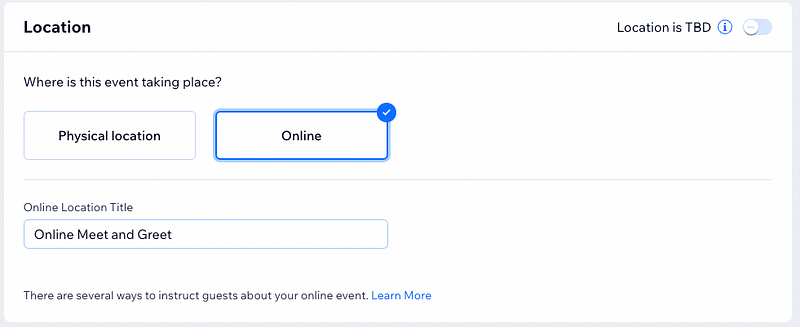
The location section deals with where the event takes place. You’ve got three broad options: Physical location, Online or ‘Location is TBD’.
If you choose ‘Online’ the only other option you need to select is the Online Location Title.
If you choose ‘Physical location’, then you need to add the address where the event will take place.
If you choose ‘Location is TBD’, then that’s all you need to do 😃
Here’s what my Online event looked like:
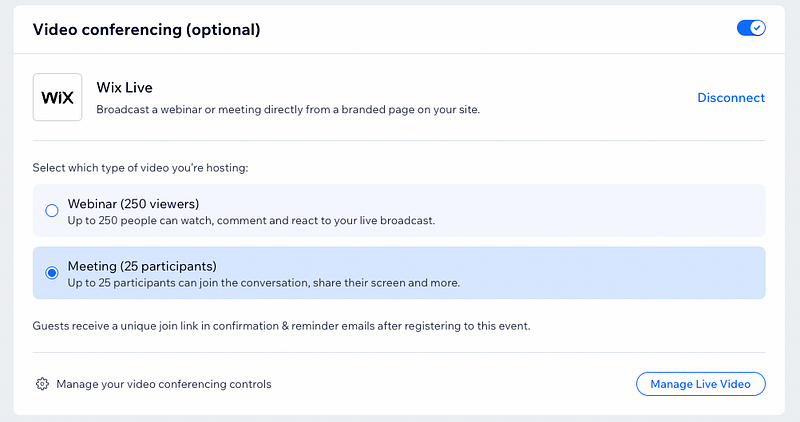
In the post-pandemic world (also called our new normal), video conferencing is ubiquitous (which means everywhere). Taking your events online wherever possible expands your reach and target market penetration for many companies.
Wix allows you to fully integrate an online experience for your customers. You can do this as a purely online only event, or hold an event which has an online component as well as a physical location.
Out-of-the-box with Wix, you have two choices. Wix Live is a solution hosted right inside of your Wix Website and managed through your dashboard. It’s a surprisingly fully featured option, with a bunch of useful features such as individual links, multiple hosts, chat messages and recording. You also get 3 free events, which allows you see if it’ll work for you. I haven’t been able to figure out who Wix uses as their video conferencing provider or if they developed their own native solution, but regardless, it’s a great option to check out.
Your other option is Zoom. This requires a bit more setup, but integrates quite effectively with the events option. You need to use a combination of your Zoom settings and Wix website settings to fully manage options such as individual access codes etc.
One consideration for your Zoom vs Wix Live choice is the lack of Wix Live integration with the Wix Bookings app. This means that you cannot use Wix Live (at the time of writing) for any one on one meetings.
Using Wix Live, here’s what I chose:
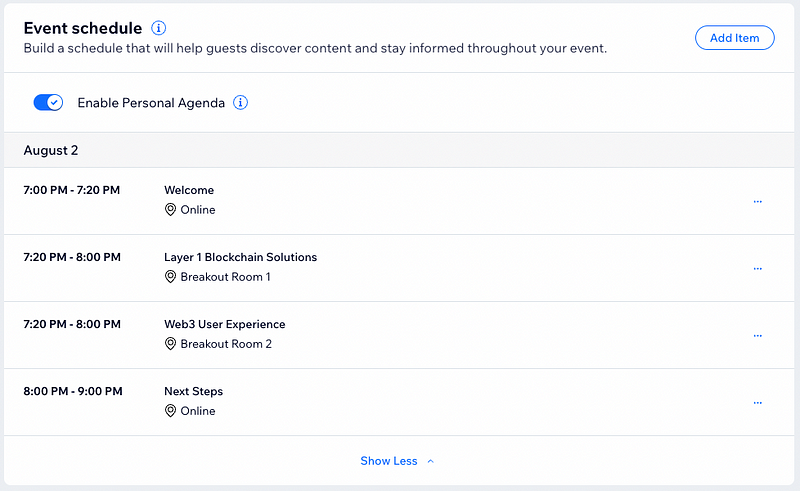
The next section allows us to set up a schedule for our event. There’s a couple of complexities here, so let me outline them for you.
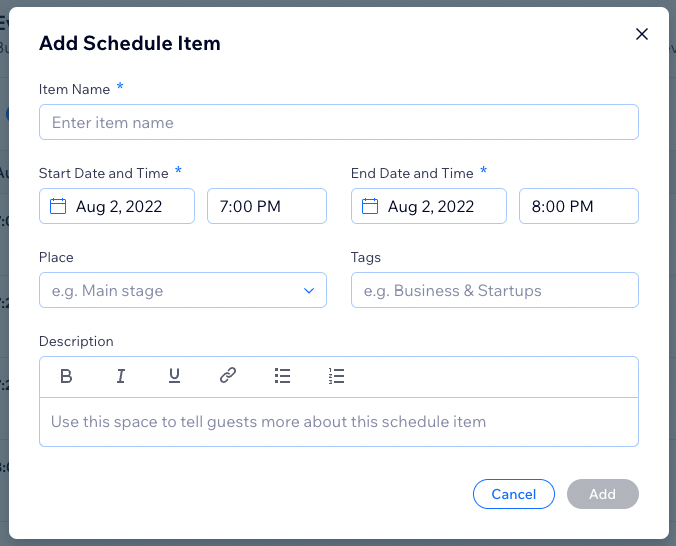
Here’s what my schedule looked like once done:
This is an optional section where you can expand more on the event. It’s helpful if you want to go into more detail than allowed in the ‘Short teaser’ part in the ‘General’ section.
I didn’t fill this out for this event.
A potentially great option for your website is connecting up a group. This can be awesome if you’re looking to create a social buzz / atmosphere around your event.
There’s a couple of things to be aware of here:
For this event, I haven’t set up a group. My reasoning for this is that I’m meeting new customers — which is not the time to be sharing their details around in a group.
Alrighty, we’ve finished setting up our event details so save the draft and let’s move to the next section.
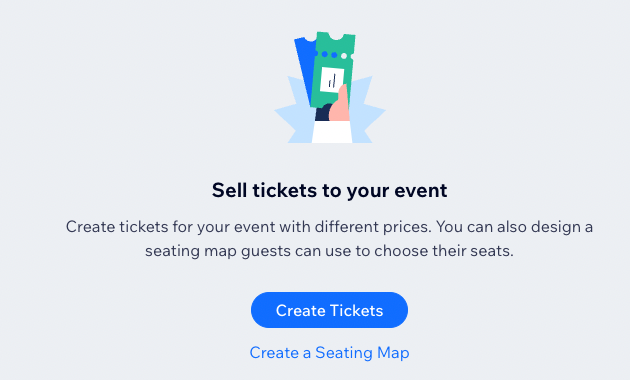
The next component of configuring our event is setting up our tickets. It is in this section that we start to create our pricing models, which we’ll use in future episodes.
Although it’s not relevant for the event I’ve been creating (online), I’ll cover setting up a seating map here.
A seating map allows you to achieve a couple of things:
If you desire to go down this route, here’s how you do it.
2. Choose your template (or start with a blank template) then ‘Create Map’
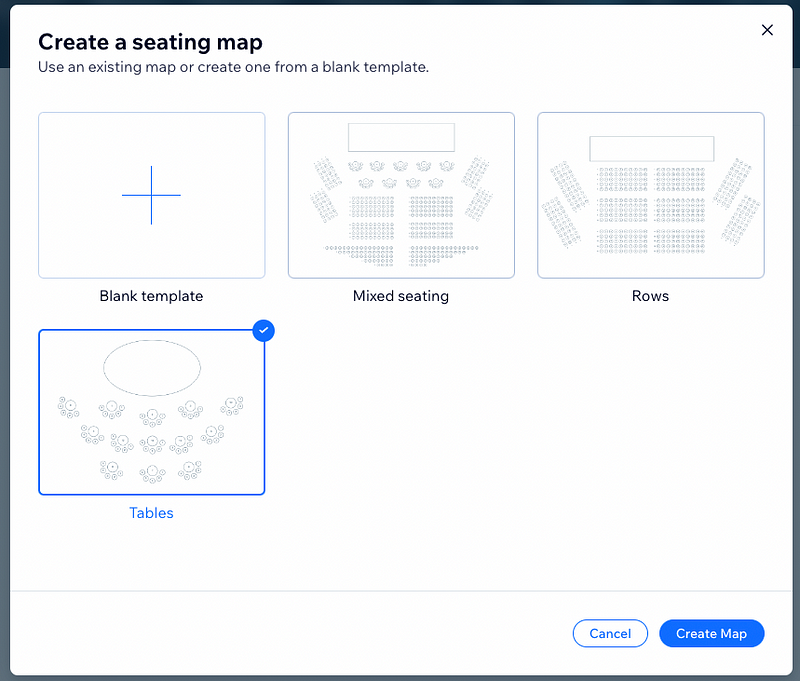
3. Fill out the details of your template. For instance if you chose ‘Tables’ you would fill out this map:
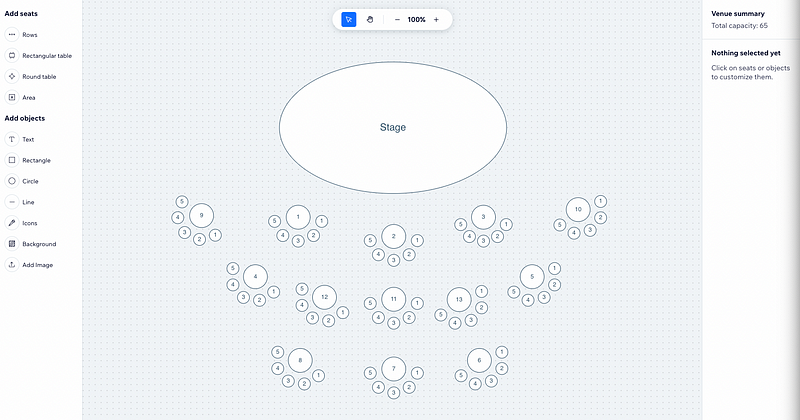
That’s it! Here’s what I ended up with:
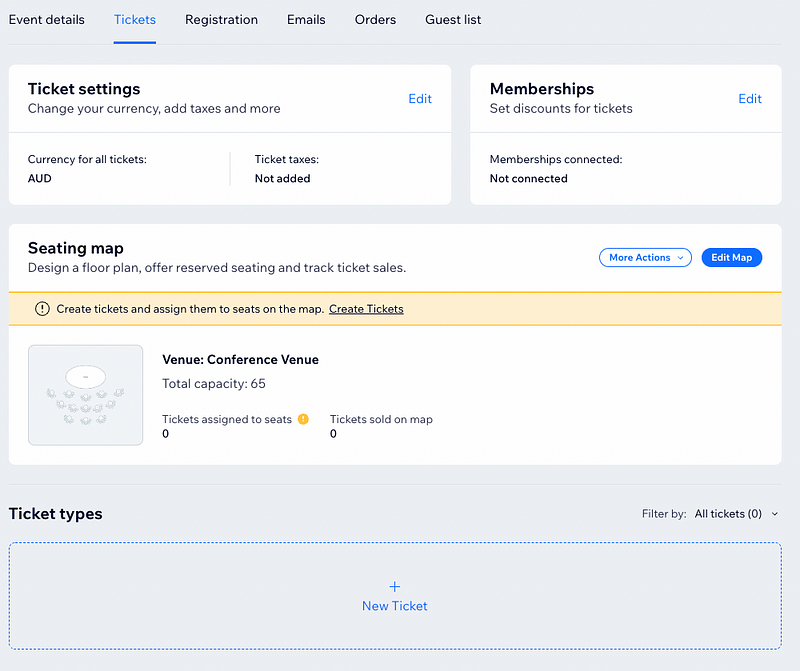
You’ll also notice that Wix is now prompting me to create tickets which are assigned to specific seats.
Very cool, and very straightforward!
We’re now at the stage of creating tickets. Depending on how you’re following me through the tutorial, you’ll either have the previous screen, or the one below. So let’s go with creating our tickets.
Using the ‘Create Tickets’ OR ‘+ New Ticket’ option, start to fill out some details:
Once done, Save the ticket. Here’s what mine looked like:

At this point you can go back into the app and apply your ticket to your seating map and some discount codes.
We will cover the discount codes later in this series.
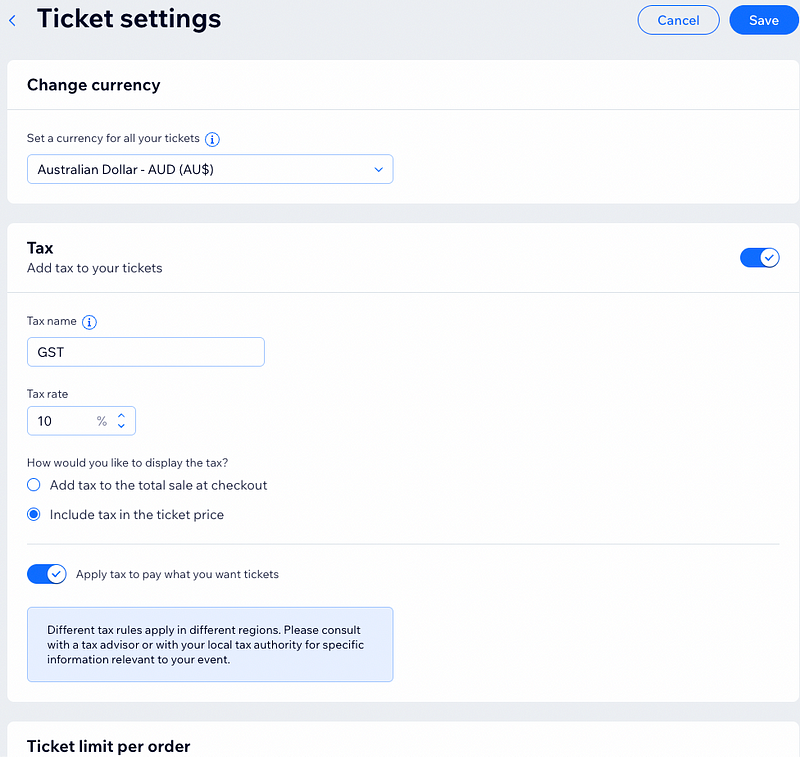
In the ticket settings section, we’re able to configure some general rules for our event.
Here’s my settings (I set the ticket limit to 5):
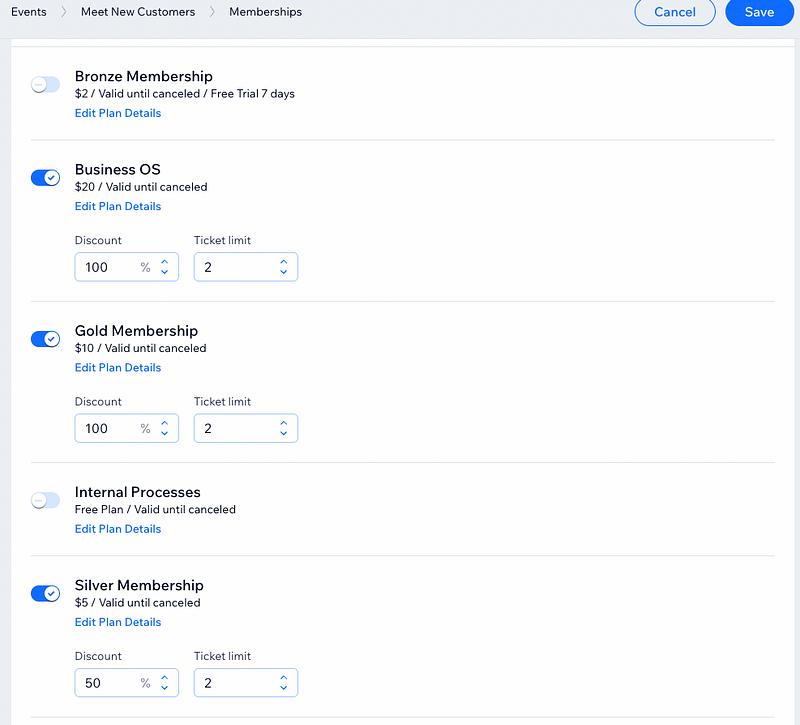
Demonstrating yet another superb simplification of using the Wix Events App, you can link discounts to Members of your site.
It’s pretty simple:
For instance, I chose to let my ‘Gold’ and ‘Business OS’ members get 100% discount (i.e. free) and Silver members 50%. They could only order 2 tickets at this price.
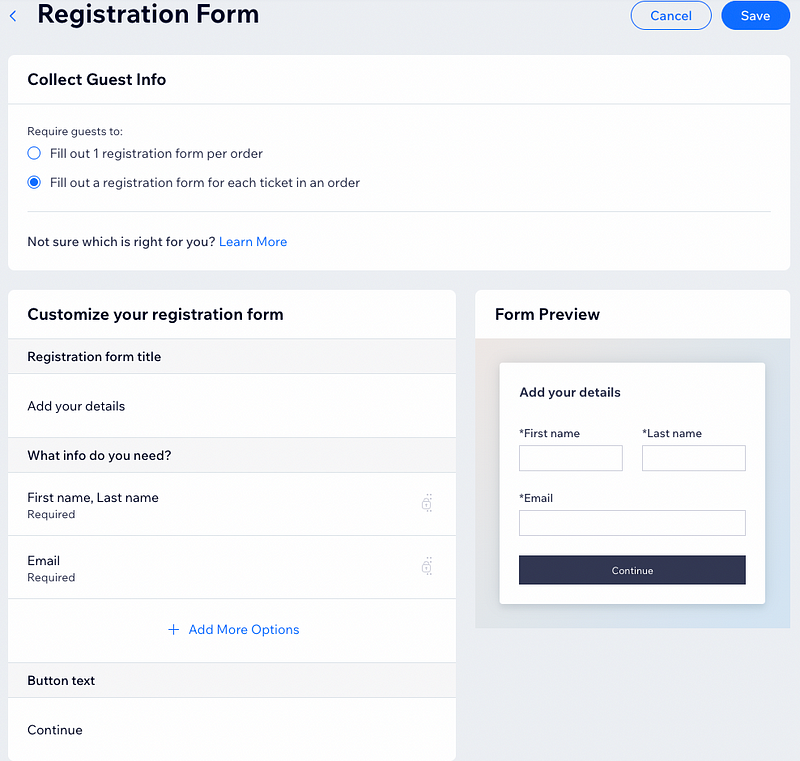
The final section in this episode is configuring our Wix Events Registration settings. Phew!
Our registrations allow us to manage things like our event policies, the information required at sign up and more. So let’s get into it.
This setting simply determines our Registration channel. You only have three options here:
This section allows you specify the information you’ll gather about your guests.
One word of warning here: under most jurisdictions the information you collect about people is governed by privacy law. As you modify this section, ensure that you’ve consulted a relevant expert in your area and understand the information you’re collecting.
Here’s your options:
For my form, I didn’t need any more information than the standard options, so my form is pretty simple. Modify yours as needed 😃
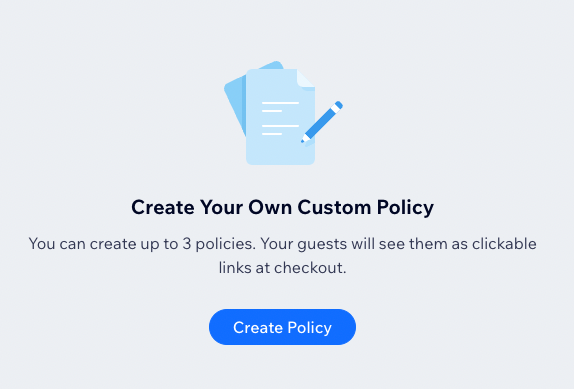
In this section you can add up to three policies for your event. This typically includes things like:
To create an event policy, undertake the following:
2. Fill in the policy info. Here’s an example
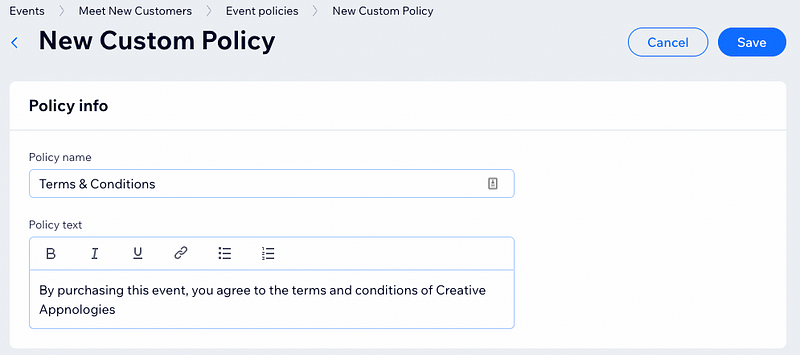
3. Save
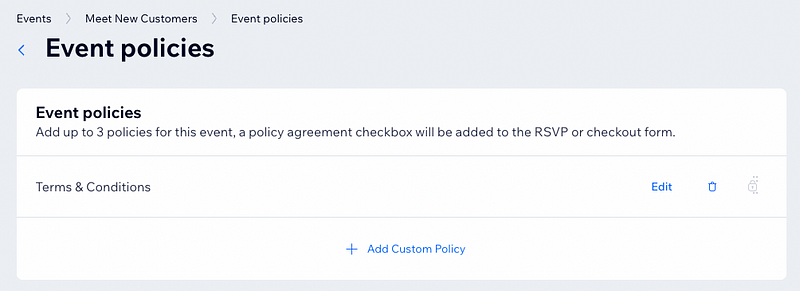
Here’s what a completed one looks like:
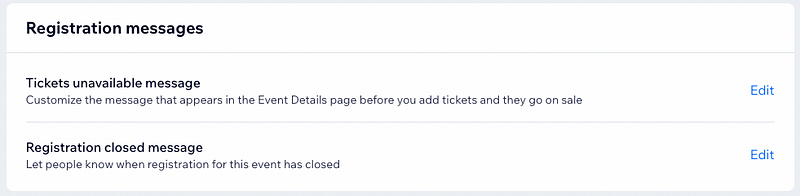
The final part of our registration settings is letting our guests know when registration is unavailable or closed. We do this through the registration settings.
And that’s it!
Alrighty!
We’ve now got a fully configured Wix Event ready to go. We could honestly publish it right now, so if that’s where you’re at, feel free to skip straight through to episode 4: Publishing An Event.
However, we can serve our customers even more effectively by filling out our CRM and getting their feedback. To do that, follow our next episode: CRM Basics.
As with everything I write, I hope you find this helpful ❤️. It would mean the world to me if you took the time to give me a ‘clap’ on Medium, or subscribe to my email list. If you’re looking to subscribe to Medium, feel free to use my referral link (it doesn’t cost you any extra, but does mean I get a portion of your subscription fee).
Enjoy, and feel free to drop me a DM on twitter, connect on LinkedIn / Github with thoughts and comments 😃